Are you looking to add a PayPal payment form to your WordPress site?
PayPal makes it super-easy to accept payments on your website. It is convenient, cost-effective, secure, and already used by millions of users around the world.
In this article, we’ll show you how to easily add a PayPal payment form in WordPress.
Why Accept PayPal Payments in WordPress?
You don’t need a full-fledged eCommerce store to accept payments on your WordPress website. If you’re only selling a single product or accepting payments for consulting or services, then adding a payment form is much simpler.
PayPal is arguably the most popular and trusted online payment gateway in the world. And since PayPal handles the entire transaction, you don’t have to worry about security issues, getting a separate merchant processor for credit cards, or PCI compliance.
With that being said, let’s take a look at how to easily add a PayPal payment form in WordPress.
How to Add a PayPal Payment Form in WordPress
There are many WordPress PayPal plugins available in the market that lets you add a payment button or order form on your site.
But when it comes to the flexibility of building the order form and add customizations without code, we believe WPForms is the best option.
WPForms is the best drag and drop form builder plugin for WordPress used by over 5 million websites. It lets you create a simple billing or order form without the need for a full-fledged eCommerce platform or shopping cart plugin.
We recommend using WPForms because it lets you accept both PayPal and credit cards in the same form through their integration with credit card services like Stripe, Square, and Authorize.net.
The first thing you need to do is install and activate the WPForms plugin. For more details, see our step by step guide on how to install a WordPress plugin.
While they have a Lite version that’s free, you will need their Pro plan to access the PayPal addon and order form template.
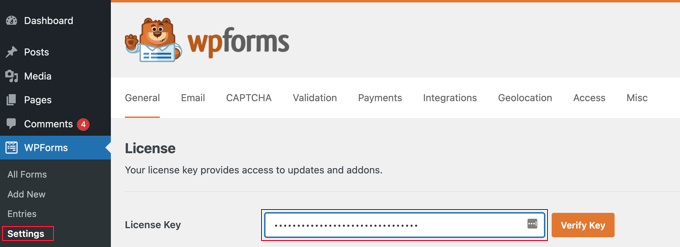
Upon activation, you need to visit the WPForms » Settings page to enter your license key. You can find this information in your WPForms account area. Make sure you click the ‘Verify Key’ button to activate your license.
Next, go to the WPForms » Addons page. Here, you need to install the PayPal Standard addon. Simply find it in the list, and then click the ‘Install Addon’ button below it.
The addon will be automatically installed and activated for you.

Now, it’s time to create your payment form.
Creating a PayPal Payment Form in WordPress
Simply go to the WPForms » Add New page in your WordPress admin area to launch the form builder.
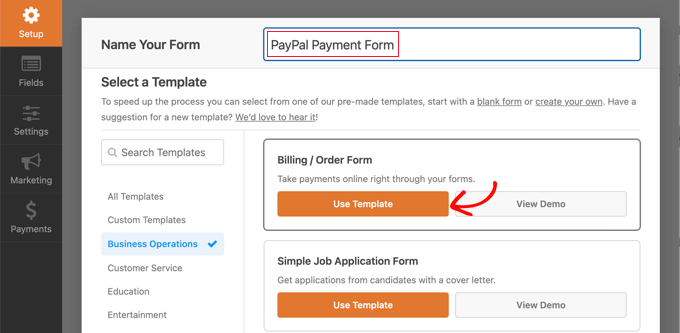
First, you need to provide a title for your form and then scroll down to the ‘Billing / Order Form’ template and click the ‘Use Template’ button.
WPForms will now automatically load your form template in the drag and drop builder. It’s easy to add, remove, or change the fields on your form.
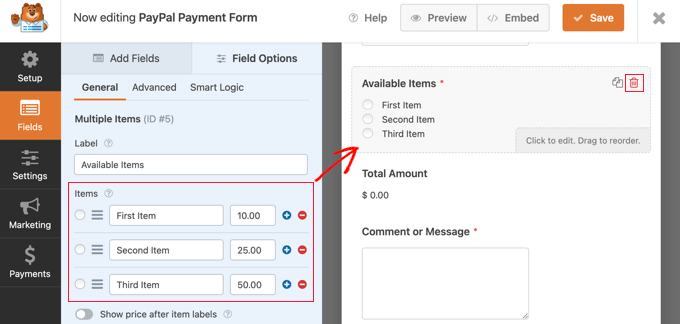
For example, a Multiple Items list has been added to the form so your visitors can select the product or service they wish to pay for. Once you click on this field you will be able to customize the field’s label and the name and price of each item.
If you are only offering a single item, then you should delete the Multiple Items field by clicking the trash icon in the top right corner of the field.
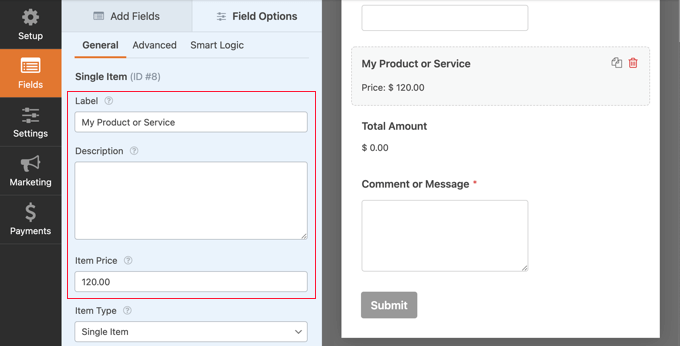
Next, you can scroll down to the Single Item field and drag it onto your form.
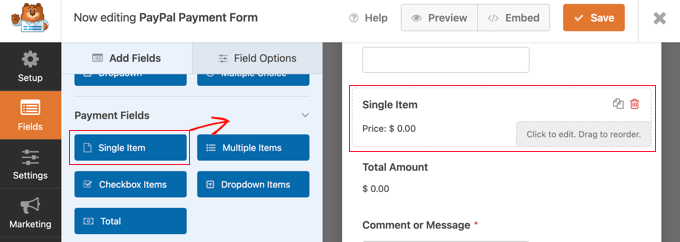
You can click on this field to customize it.
For instance, you can change the field’s label, description, and price. The preview of your form on the right will be updated automatically.
If you are only offering a single item, then the Total field is unnecessary. Feel free to delete it.
Next, you need to go to Payments » PayPal Standard to set up PayPal. Simply check the ‘Enable PayPal Standard payments’ box.
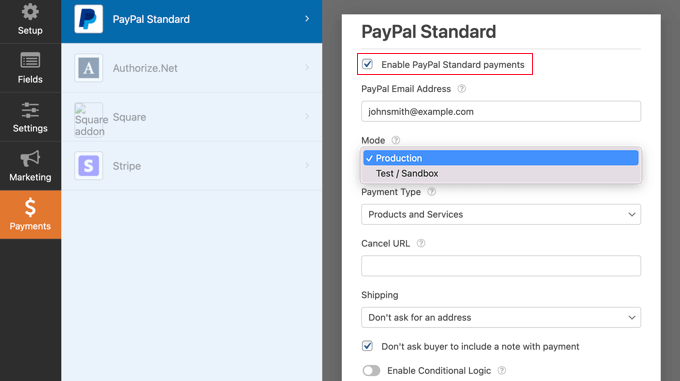
If you don’t already have one, you will need to create a PayPal account. Then you can enter your PayPal email address into the WPForms settings.
After that, you need to fill in the other PayPal settings. If you wish to test your payment form, then you should select the ‘Test / Sandbox’ mode. This allows you to make dummy PayPal payments to make sure that the form is working correctly.
Don’t forget to change the Mode option back to ‘Production’ when you have finished testing.
Most websites will need the ‘Products and Services’ payment type. The other option is ‘Donations’, and you can learn more in our guide on how to add a PayPal donate button.
You can also add a URL to redirect users who don’t complete the payment, and decide whether a shipping address and note are required.
Finally, you can use the ‘Enable Conditional Logic’ option to accept multiple payment types. For more details, see our guide on how to allow users to choose a payment method on WordPress forms.
Once you’re done, click the Save button to store your settings.

Your online PayPal payment form is now ready, and you can add it to any WordPress post or page on your website.
Adding Your PayPal Payment Form to Your Website
WPForm makes it super easy to add forms anywhere on your website.
Simply create a new post or page, or edit an existing one. Then, click on the plus (+) sign at the top and add a WPForms block in the WordPress editor.

After that, select your order form from the dropdown menu in the WPForms block.
Once you’re finished, you can save or publish your page and click on the preview button to see your form in action.
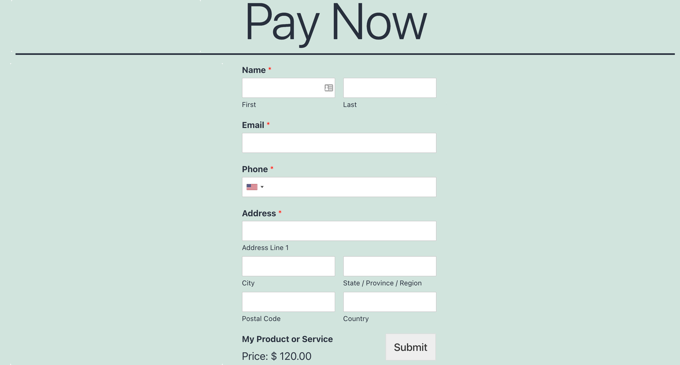
When your users fill in the form and click the ‘Submit’ button, the ‘Pay with PayPal’ screen will appear automatically so they can finalize the payment.
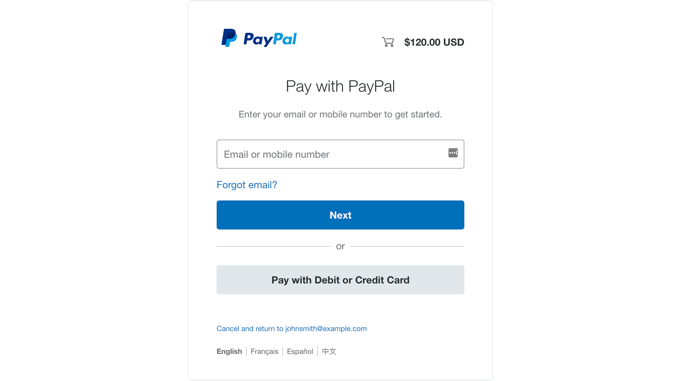
Congratulations, you’ve now created a PayPal payment form in WordPress.
You can connect your payment forms with email marketing services, Google sheet, and other apps to further streamline your workflow using WPForms native integrations.
We hope this tutorial helped you learn how to add a PayPal payment form in WordPress. You may also want to learn how to get a free email domain, or check out our list of must have plugins to grow your site.
If you liked this article, then please subscribe to our YouTube Channel for WordPress video tutorials. You can also find us on Facebook and Facebook.
The post How to Add a PayPal Payment Form in WordPress (Step by Step) first appeared on WPExperiencecoder.