Do you want to customize WooCommerce product pages without having to write any code?
By customizing your WooCommerce product pages, you can improve your conversion rate and generate more sales from your existing website visitors.
In this article, we’ll show you how to customize WooCommerce product pages without any technical knowledge.
Why Customize WooCommerce Product Pages in WordPress?
Your WooCommerce product pages are some of the most valuable pages in your online store. The problem is that the default WooCommerce product pages aren’t optimized for conversions.
By customizing your WooCommerce product pages, you can create unique product landing pages that will convert your visitors into customers at a much higher rate.
This means your store can earn more revenue without needing additional traffic.
Before you start customizing your WooCommerce product pages, you need to make sure you have the fastest WooCommerce hosting to support your online store because speed impacts conversion.
That being said, let’s take a look at how you can customize WooCommerce product pages with no code.
How to Customize Your WooCommerce Product Pages in WordPress
SeedProd is the best drag and drop page builder used by over 1 million websites. It lets you easily customize your WooCommerce product pages and boost sales.
First thing you need to do is install and activate the SeedProd plugin. For more details, see our step by step guide on how to install a WordPress plugin.
Note: there is a free version of SeedProd available that you can use, but for this tutorial, we’ll show the Pro version since it has the built-in WooCommerce blocks.
Upon activation, you need to visit SeedProd » Settings and enter your license key.

You can find this information under your account on the SeedProd website.
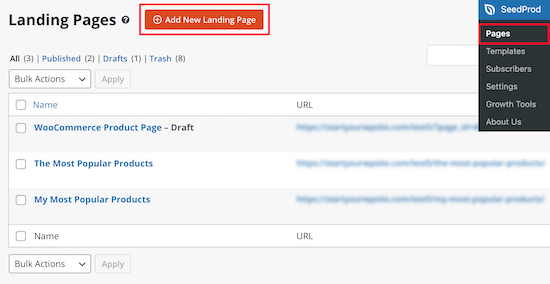
Next, you need to visit SeedProd » Pages and then click on ‘Add New Landing Page’.
On the next screen, you’ll be asked to choose a template. SeedProd has dozens of professionally designed templates to choose from.
Since you’re building a high-converting WooCommerce product page, select the ‘Sales’ option and then choose one of the templates.
Simply click on a template to select it.

We’ll be using the ‘Dinner Sales Page’ template, but you can choose any template you like.
Next, you’ll be asked to give your page a name and then click the ‘Save and Start Editing the Page’ button.

This will launch the drag and drop page builder interface.
You’ll see a live preview of the template you selected, where you can point and click to select and edit any item on the page.
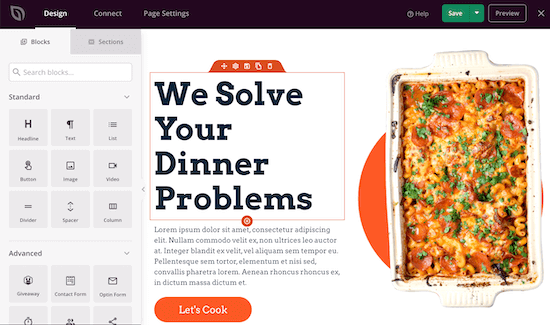
The left hand column has new blocks that you can add to your product page.
Next, we’ll add a few blocks to make this page more like a WooCommerce product page.
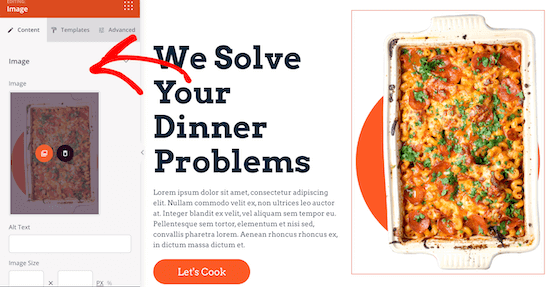
First, click on the image and replace it with an image of your product. You will upload an image or select one from your media library.
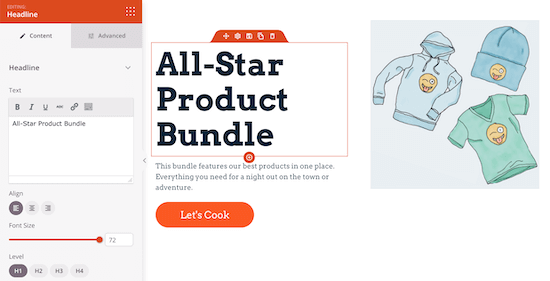
After that, you can change the product title and text by clicking on those items and changing them directly in the page editor.
The left hand menu lets you change the size, alignment, and more.
Finally, we’ll add an ‘Add to Cart’ button just like a standard WooCommerce product page.
You need to find the ‘Add to Cart’ WooCommerce block and drag it onto your page.
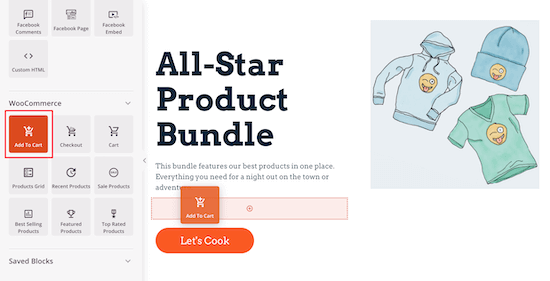
Now that you have the basics of your WooCommerce product page, we’ll show you how to add items that will improve your conversions.
First, let’s add a product star rating to show your customers that your product is high quality.
Simply drag the ’Star Rating’ block and drop it on the page preview where you want it to be displayed.
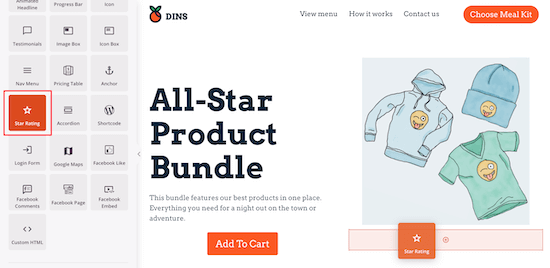
You have complete control over the number of stars, the size, the total rating number, and more.
After that, we’ll add a customer testimonials block. Adding product testimonials can help to improve your social proof and product conversions.
If you’re looking for a way to collect customer testimonials, see our list of the best testimonial plugins for WordPress.
To add testimonials, simply drag the ‘Testimonials’ block onto the page where you want it to be displayed.
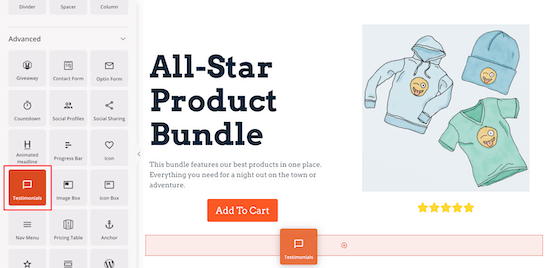
You can fully customize the testimonial, add an image, and change the testimonial text.
Once you click on the testimonial item, you can change all of the display options on the left hand menu.
If you want to add multiple testimonials, then click the ‘Add Testimonial’ button. This will automatically create a rotating carousel of your customer testimonials.
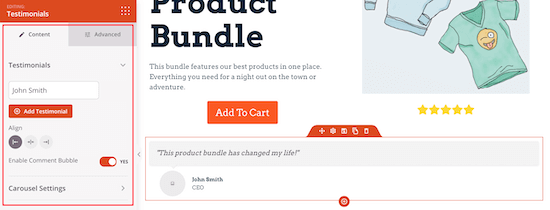
Next, you can add a product FAQ section, similar to the question and answer section on Amazon product pages.
Click the ‘Accordion’ block and drag it over to your page and then click on the item to bring up the editing screen on the left.

Here you can add another FAQ drop down, change the font size, color, and more.
You can change the FAQ text directly on the page preview.

Adding the above SeedProd WooCommerce blocks to your product pages will help to improve your conversions.
SeedProd has a few additional WooCommerce blocks you can add to your product pages as well.
If you’re running a spring giveaway sale or Black Friday sale, then you can use the ‘Countdown’ block to create urgency.
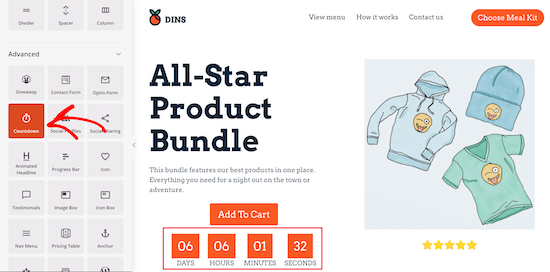
You may also want to highlight other products in your store by using the ‘Featured Products’ or ‘Top Rated Products’ blocks.
To add additional blocks, simply follow the same steps as above.

For more details on adding popular products to WooCommerce, see our guide on how to display popular products on WooCommerce product pages.
You can continue to customize your product page by using additional blocks and adjusting the settings menu.
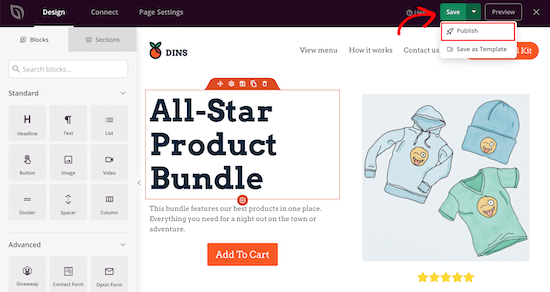
Once you’re finished customizing your product page make sure you click ‘Save’ and then ‘Publish’ from the drop down to make your page live.
The product page customizations you’ve made will make it easier to convert your visitors into buyers.

How to Improve Your WooCommerce Product Page Conversions (2 Ways)
After you have customized your WooCommerce product page, you can further improve your store conversions with the following dynamic elements.
Add Purchase Activity Notifications in WooCommerce
The first method uses social proof notifications to alert your visitors that other people have just made a purchase. This uses FOMO to simply improve your conversions.
The best way to add social proof to WooCommerce is using TrustPulse. It’s one of the best WordPress popup plugins and social proof apps in the market.
It allows you to display real-time purchase notifications across your WooCommerce site easily.
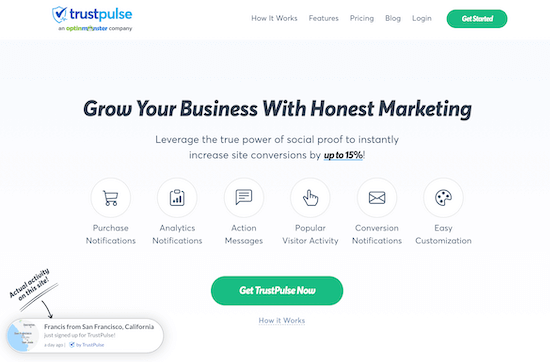
For more details, see our guide on how to use FOMO on your WordPress site to increase conversions.
Create Personalized Marketing Campaigns in WooCommerce
The second method uses dynamic text so that you can show customized marketing messages to your visitors. With dynamic text, you can show your visitor’s name, location, or even day of the week.
It allows you to show personalized messages to the right people at the right time to improve your engagement rates and conversions greatly.
The best way to add dynamic text is by using OptinMonster. It’s the best popup, and email capture tool for WordPress used by over 1.2 million websites.
First, you need to visit the OptinMonster website and create an account. You’ll need at least the Pro level plan to create dynamic text with smart tags.
Next, you need to install and activate the OptinMonster plugin. For more details, see our step by step guide on how to install a WordPress plugin.
This plugin connects your WordPress website to the OptinMonster app.
Upon activation, you need to enter your license key. You can find this information under your account on the OptinMonster website.
In your WordPress dashboard, go to OptinMonster » Settings, click ‘Connect an Existing Account’ and enter your account details.

Next, you’ll want to connect OptinMonster with WooCommerce.
This gives you additional display rules you can use to customize your campaigns. On the same page, click ‘Auto-Generate Keys + Connect WooCommerce’.

After connecting to OptinMonster navigate to OptinMonster » Campaigns and then click the ‘Add New’ button.
This will take you to the OptinMonster campaign builder tool.
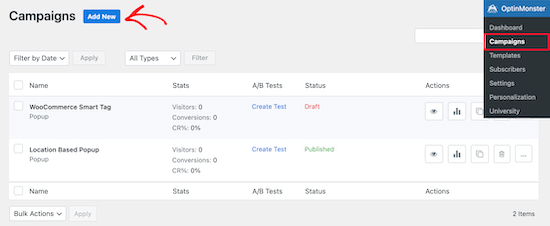
There are dozens of templates you can choose from.
We’re going to create a popup with a WooCommerce smart tag. To do this, select the ‘Popup’ campaign type and choose one of the templates.
We will select the ‘Offer’ template, but you can choose any template you like.
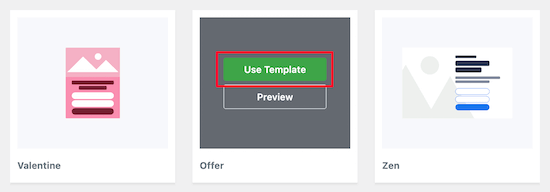
Simply hover over the template and click ‘Use Template’.
After you name your campaign and click ’Start Building’, you’ll be taken to the drag and drop campaign builder.
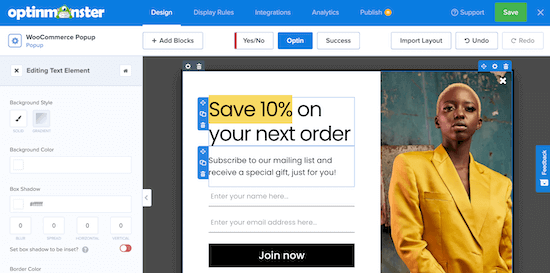
You can customize every single part of the popup by clicking on any item and customizing it on the left hand menu.
We’re going to add dynamic text to the header so it shows today’s date and offers our visitors a coupon that’s only valid for the day.
First, double click on any text element to bring up the menu. Then, click the ‘Smart Tags’ icon ‘{ }’ to bring up the drop down list of available smart tags.
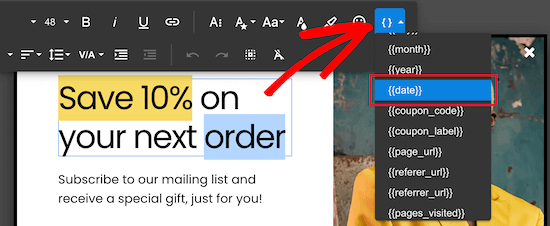
Simply click on the smart tag you want to add to your campaign.
The smart tags use dynamically generated text to provide your visitors with a unique and custom message.

Once you’re finished customizing your popup, make sure to click ‘Save’.
After that, click on the ‘Publish’ tab and then select the ‘Publish’ option.
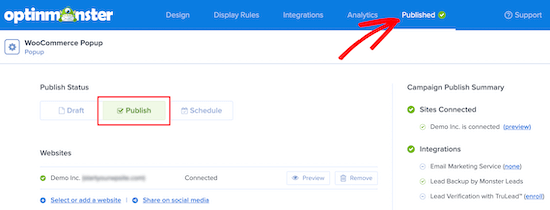
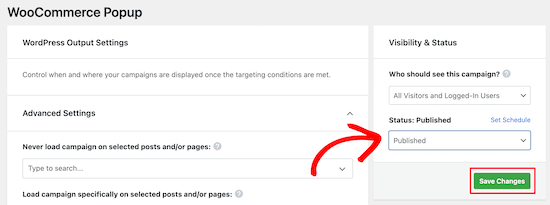
Once you exit out of the builder you’ll be taken to a screen where you can confirm your display settings.
To make sure your popup is live change the status to ‘Published’ in the ‘Visibility & Status’ meta box and then click ‘Save Changes’.
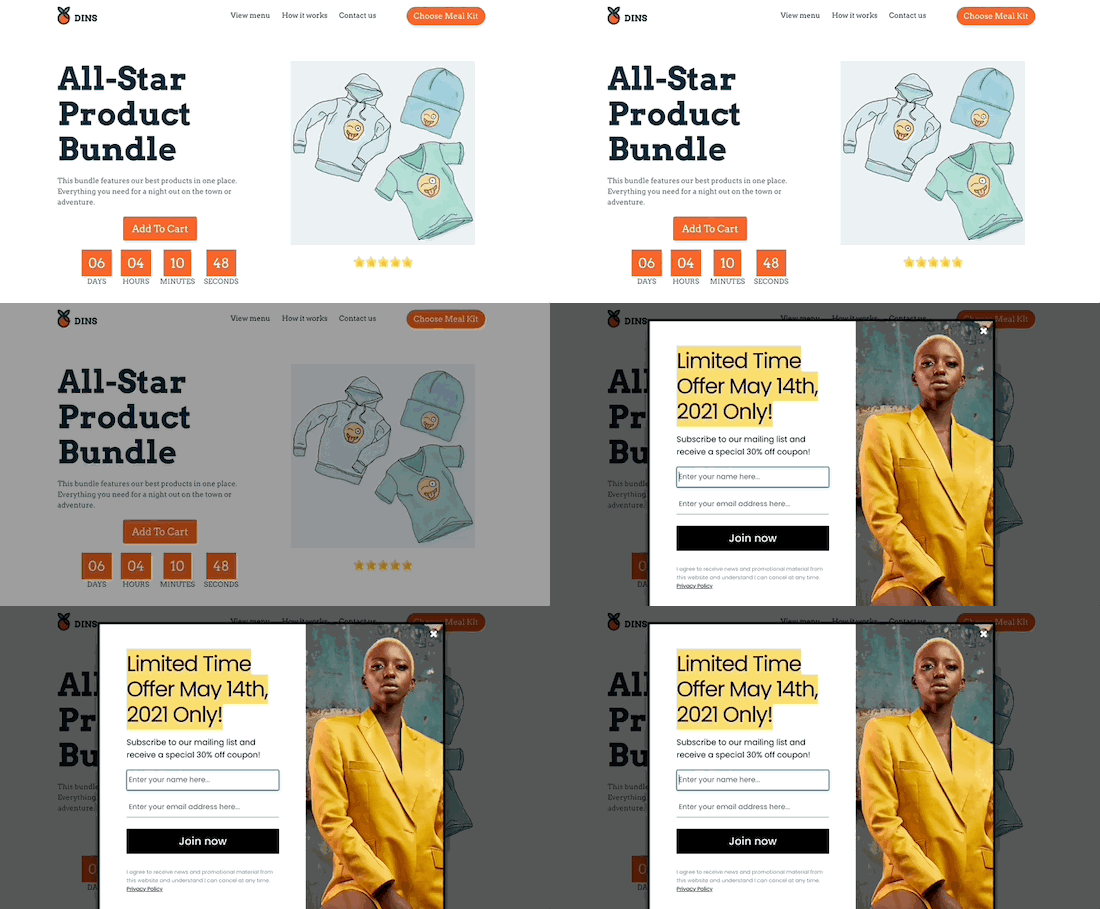
Your WooCommerce popup with dynamic text will now be live on your WooCommerce store.
You can continue to test different dynamic text and display settings to see which campaigns bring you the best results.
We hoped this article helped you customize your WooCommerce product pages without coding. You may want to see our guide on WooCommerce SEO made easy, and our expert picks of the best WooCommerce plugins for your store.
If you liked this article, then please subscribe to our YouTube Channel for WordPress video tutorials. You can also find us on Facebook and Facebook.
The post How to Customize WooCommerce Product Pages (No Code Method) appeared first on WPExperiencecoder.