Are you looking for a simple way to verify your WordPress site on Pinterest?
Verifying your website on Pinterest will unlock neat features like Pinterest analytics, ads program, stats for your photos, and more.
In this article, we will show you how to easily verify your WordPress site on Pinterest.
Why You Should Verify Your WordPress Site on Pinterest?
Pinterest is one of the most popular social media platforms to share your photos, videos, and other visual content. It allows you to create an account and manage your images like Instagram or Flickr.
It also allows other users to collect website links, and other visual content by creating boards.
If you are running a photography website or any other type of blog with images and videos, then Pinterest can be an important source of traffic.
Verifying your website on Pinterest will help you learn more about your visitors using Pinterest Analytics. You will also be able to participate in their ad program and plan a strategy to grow your Pinterest traffic.
That being said, let’s take a look at how to easily verify your WordPress blog on Pinterest.
How to Verify Your WordPress Site on Pinterest
Before we start, you’ll need to upgrade your Pinterest profile to a business account. This will allow you to use all their Pro tools like analytics, ads program, and more. The Pinterest business account is free and easy to set up.
Ready, let’s get started.
Step 1. Upgrade Your Pinterest Account to Business
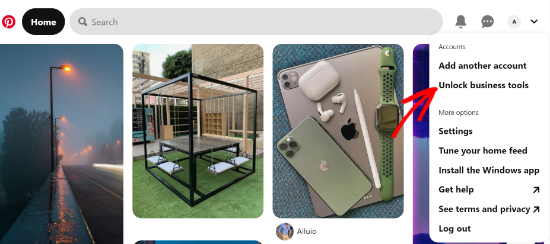
First, you need to log into your Pinterest account and click on the down arrow at the top right corner of your screen. Next, click on the ‘Unlock business tools’ option.
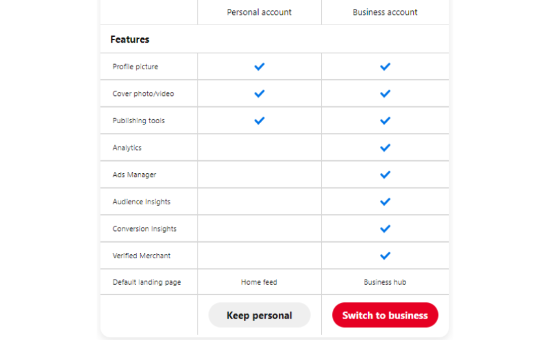
On the next screen, you will see a list of features the business account will offer. To use these features, click the ‘Switch to business’ button.
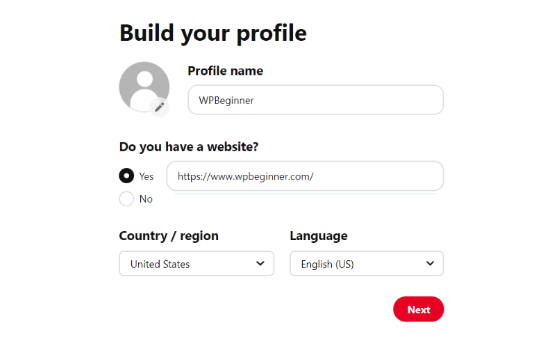
After that, enter your business account details like a profile name, website URL, country, and language. Once you have entered all these details, click the ‘Next’ button.
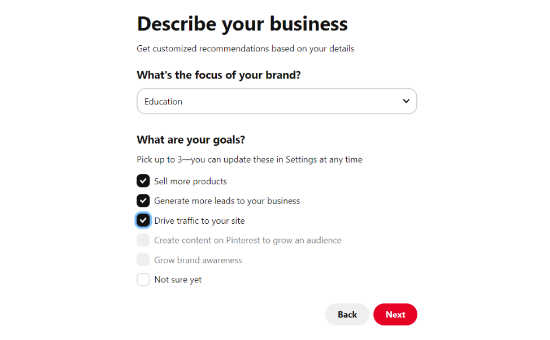
Pinterest will now ask you to describe your business. You can select an industry from the drop-down menu and pick 3 goals from the given options. After that, click the ‘Next’ button.
Now select an option to get customized recommendations and click the ‘Next’ button.

On the next screen, you can select an option if you are interested in advertising on Pinterest and then click the ‘Next’ button. For the sake of this tutorial, we selected the ‘No, I am not planning to advertise’ option.

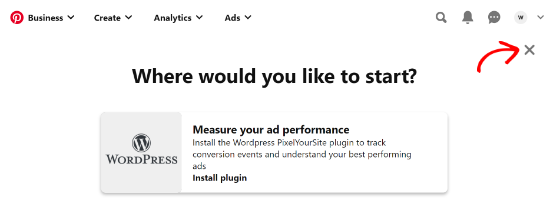
Next, Pinterest will show you different options to get started with your business account. You can click the ‘cross’ icon in the top right corner to skip this part.
Step 2. Claim Your Website on Pinterest
The next step is to claim your website on Pinterest.
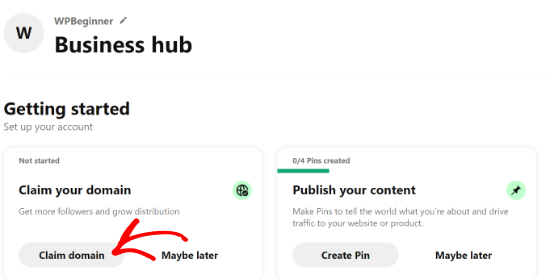
To do that, you can click on the ‘Claim domain’ button from your Pinterest Business hub page, and it will directly take you to the claim settings page.
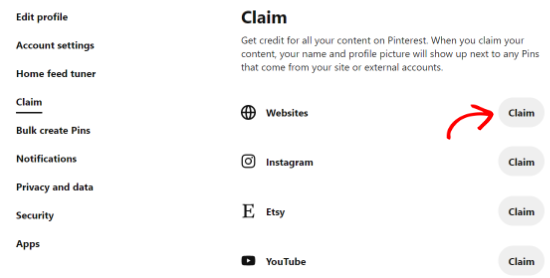
Another way to claim your website is by clicking on the down arrow in the top right corner and selecting the ‘Settings’ option. Then head over to the ‘Claim’ section in the left menu.
To get the credit for your content on Pinterest, click the ‘Claim’ button for Websites.
Once you click the button, a popup window will appear with three options to claim your WordPress website.
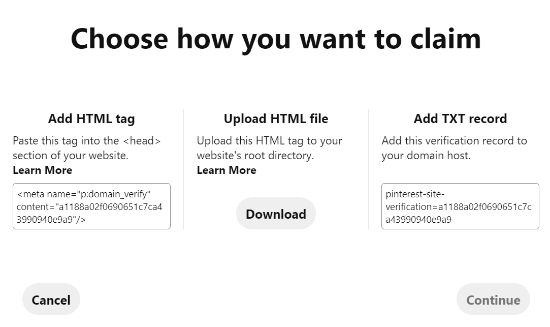
We are choosing the ‘Add HTML tag’ option because it is the easiest.
However, if you prefer, you can choose the other option where you download the HTML file and upload it to your website’s root directory using an FTP client or your WordPress hosting file manager.
Alternatively, you can also add a verification record to your domain settings using your domain registrar.
Step 3. Add HTML Tag to Your WordPress Website
There are multiple ways to add an HTML tag to your website’s header, but we will only cover the two easiest methods.
First, you can use the All in One SEO (AIOSEO) WordPress plugin and enter the HTML tag to your website. For more details, follow our guide on how to install a WordPress plugin.
AIOSEO is the best SEO plugin for WordPress and makes it very easy to optimize your site for search engines without hiring an expert.
While we recommend the Pro version, you can also use the free version of AIOSEO to add Pinterest verification.
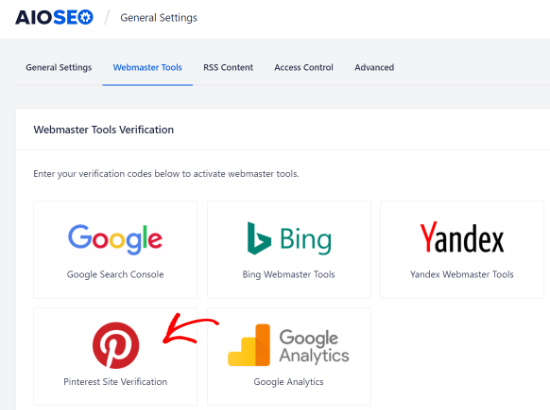
To add the HTML tag, go to All in One SEO » General Settings and then click the ‘Webmaster Tools’ tab from the top menu.
After that, click the ‘Pinterest Site Verification’ block.
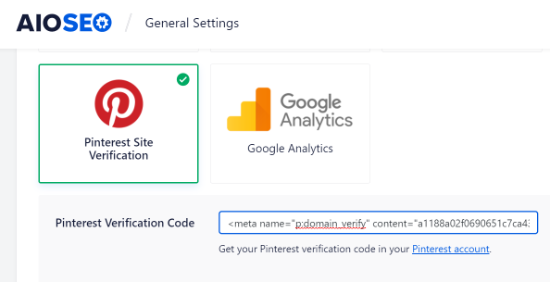
Now enter the HTML tag you copied in the previous step in the Pinterest Site Verification field and click the ‘Save Changes’ button.
Aside from using AIOSEO, another way of adding the HMTL tag is by installing and activating Insert Headers and Footers plugin.
Upon activation, you need to visit Settings » Insert Headers and Footers page in your WordPress admin area. In the Scrips in Header section, you need to paste the HTML tag and click on the Save button.
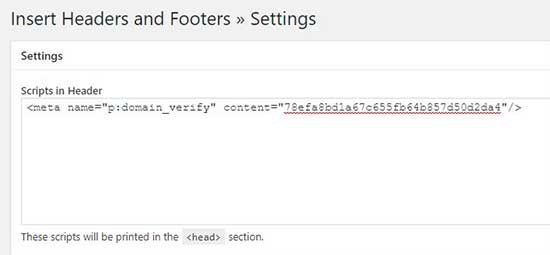
Once the HTML tag is added in your website’s header section, you need to go back to the Pinterest screen and click on the Continue button in the popup.
It will now ask you to enter the URL of your website and then click the ‘Verify’ button.
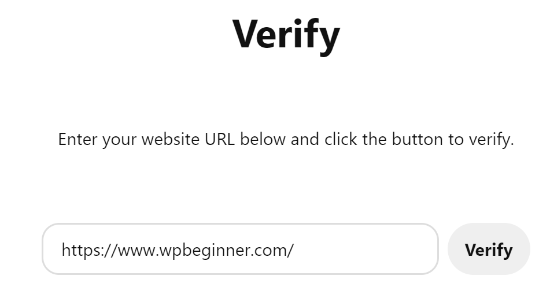
Once you do that, you will see a message saying ‘Verification in progress.’ Normally, the process takes 24 hours, and you get an email about your website’s verification.

That is it, you have now successfully verified your WordPress website on Pinterest.
Tip: If Pinterest fails to verify after you’ve added the verification code, then it means you need to clear your WordPress cache.
We hope this article helped you learn how to verify your WordPress site on Pinterest. You may also want to see our expert pick of the must-have WordPress plugins for your website, and our comparison of the best business phone services for small business.
If you liked this article, then please subscribe to our YouTube Channel for WordPress video tutorials. You can also find us on Facebook and Facebook.
The post How to Verify Your WordPress Site on Pinterest (Step by Step) appeared first on WPExperiencecoder.