Do you want to add your WooCommerce store to Facebook?
Facebook is one of the largest social media networks in the world. By adding your WooCommerce store to Facebook, you can send more traffic to your online store and make more sales.
In this article, we’ll show you how to add your WooCommerce store to Facebook, step by step.
Why Add Your WooCommerce Store to Facebook?
Facebook is one of the most popular social media platforms in the world today. By adding your products to Facebook, you can better promote your online store and generate more sales.
Adding your WooCommerce store to Facebook lets you reach your followers in new ways, so you can:
- Simply sell more products
- Expose your Facebook followers to your online store
- Deepen your customer relationships
- Grow your revenue
That being said, let’s show you how to add your WooCommerce store to Facebook simply.
How to Add Your WooCommerce Store to Facebook
First, you need to install and activate the Facebook for WooCommerce plugin. For more details, see our step by step guide on how to install a WordPress plugin.
Upon activation, you’ll need to navigate to Plugins » Installed Plugins and turn on ‘Enable automatic updates’.
This will ensure that your WooCommerce store continues to work with Facebook.

After that you’ll have a new menu item labeled ‘Marketing’ in your WordPress admin panel. Navigate to Marketing » Facebook and then click the ‘Get started’ button.
This will take you to a screen where you can connect your Facebook page and WooCommerce store.
Select the Facebook account that you want to link with your WooCommerce store.
Or, you can login to a different Facebook account and then click ‘Continue as…’.
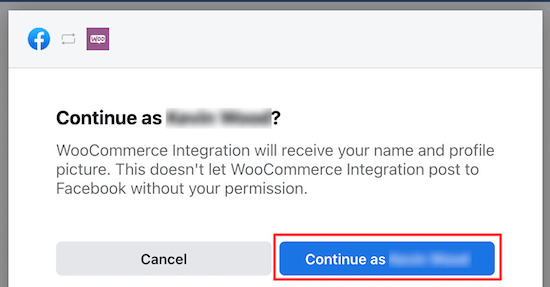
On the next screen, you’ll be asked if you want to open your ‘Facebook Shop’, ‘Facebook Ads’, and ‘Instagram Shopping’.
For this tutorial, we recommend unchecking the ‘Facebook Ads’ and ‘Instagram Shopping’ features. If you want to add these features later on, then it’s much easier to do directly from your Facebook business account.
Next, click ‘Get Started’.

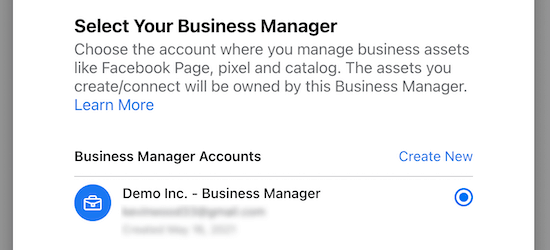
Once you’ve done that you need to select your Business Manager account and click ‘Continue’.
This is a separate profile from a personal Facebook page that lets you manage the business assets connected to your Facebook account.
If you don’t have a Facebook business account, then click ‘Create New’ and follow the steps for creating an account.
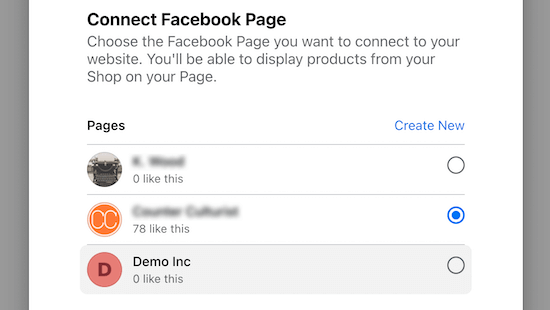
Next, you need to connect to a Facebook page.
Simply choose the Facebook page where you want to display your WooCommerce products and then click ‘Continue’.
Then, you need to choose an existing WooCommerce product catalog.
Next, you need to select a Facebook Pixel. This allows you to track your inventory between Facebook and WooCommerce.
![]()
If you don’t have one created yet, then click the ‘Create New’ button to generate a new Facebook Pixel. You need to give your pixel a name and click ‘Continue’.
Once you’ve done that, you’ll be asked to confirm your Commerce Account. This account will be used to feature your products across Facebook, and then click ‘Continue’.
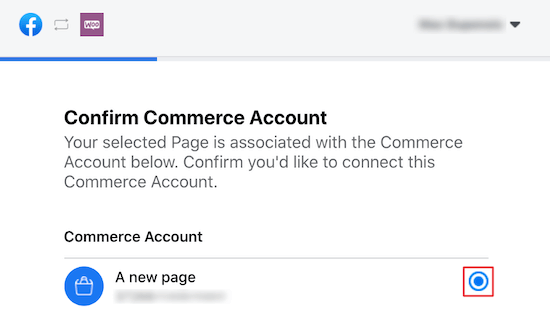
Note: At this point, a lot of users report errors with continuing the integration.
Luckily, all of your account data you added so far is saved, so we will continue the integration process from within your Facebook account dashboard.
You need to click on the ‘Business Apps’ icon and then click ‘WooCommerce Integration’.
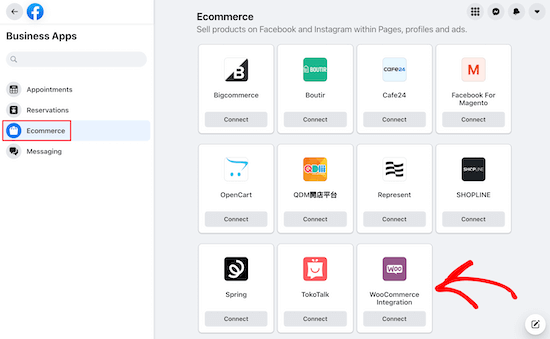
This will take you to a page where you can connect your WooCommerce store.
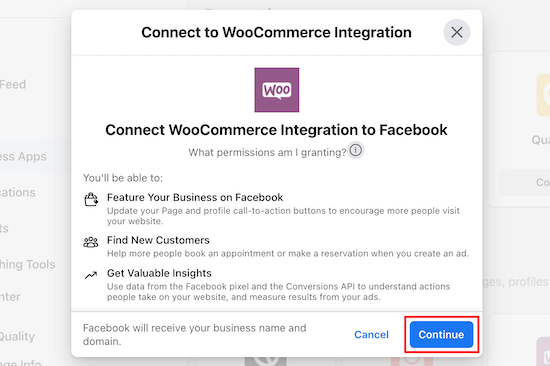
Next, you need to click ‘Continue’, and the app will integrate with your store.
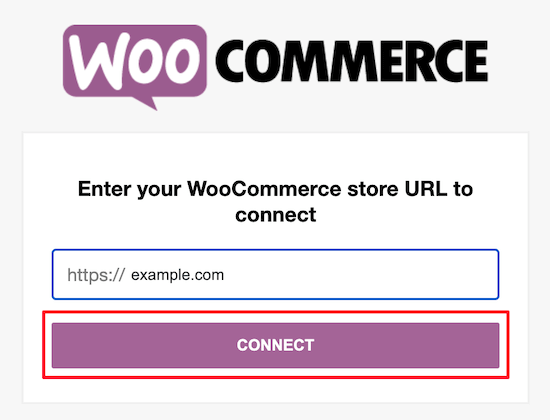
Then, you need to enter your WooCommerce store URL and click ‘Connect’.
Make sure you enter your store URL and not your website URL (sometimes they’re different).
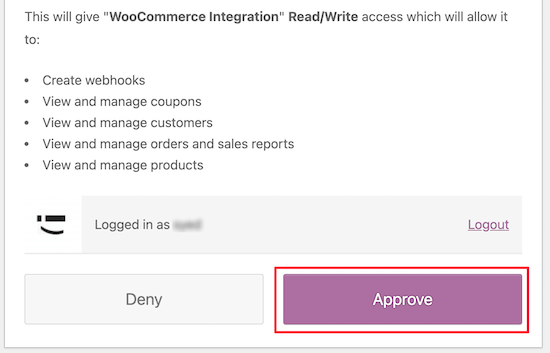
After that, you will confirm the linking of your accounts.
All you need to do is click ‘Approve’.
Once you’ve done that select your Facebook Business account and click ‘Continue’.
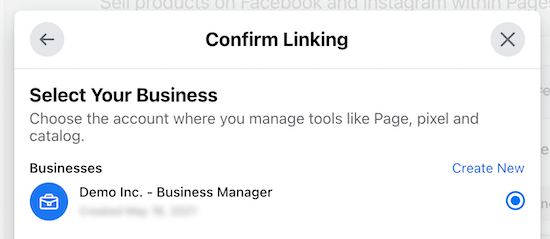
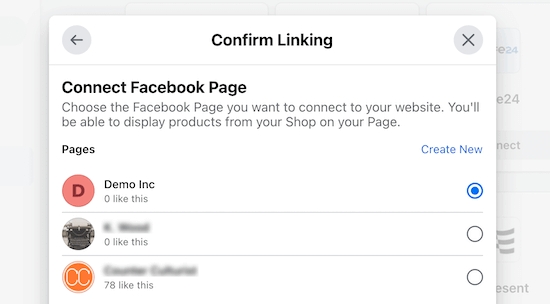
Then, you need to choose the Facebook page you want to connect your WooCommerce store with.
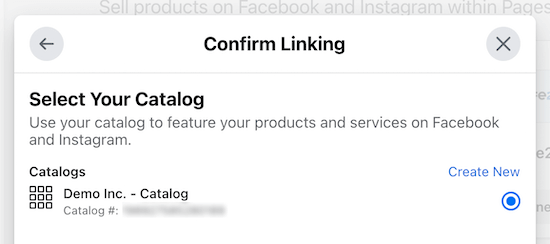
Next, you’ll be asked to select your WooCommerce product catalog and click ‘Continue’.
Once you’ve done that, you need to connect your account to the Facebook Pixel for tracking and click ‘Continue’.
![]()
The final option is choosing how your customers will checkout.
You can allow your customers to checkout via Facebook, Instagram, or checkout on your website.

We recommend having your customers checkout on your website, since your website have a more optimized checkout process on your online store.
You’ll need to select and then confirm the Commerce account associated with your website and click ‘Continue’.
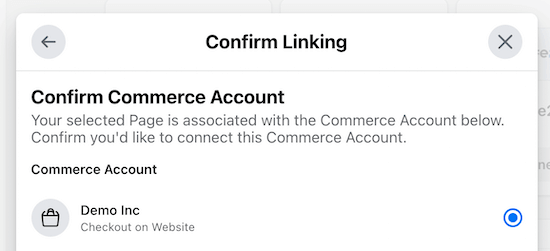
After that, you can review your connection settings.
Once you’ve verified your connection settings are correct, click ‘Continue’.
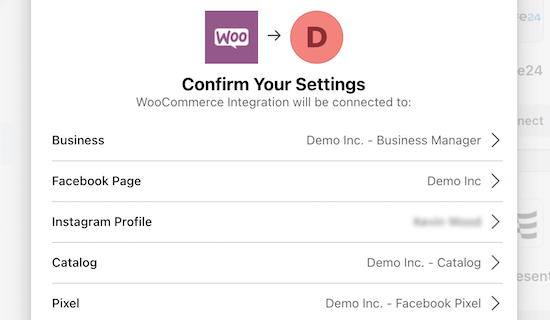
You may be asked to verify your domain name.
If so, then select the domain name linked to your WooCommerce store and click ‘Continue’.
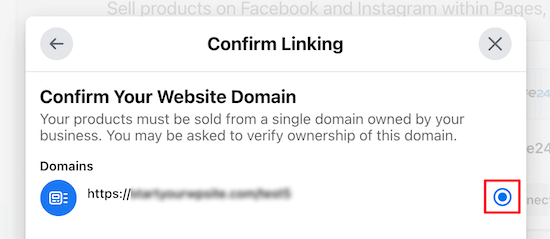
Once you’ve completed the setup wizard, your WooCommerce store will now be linked to Facebook, and your visitors will be able to browse your products to make purchases.
On the backend of your store, you’ll be able to view and manage your WooCommerce product catalog simply.
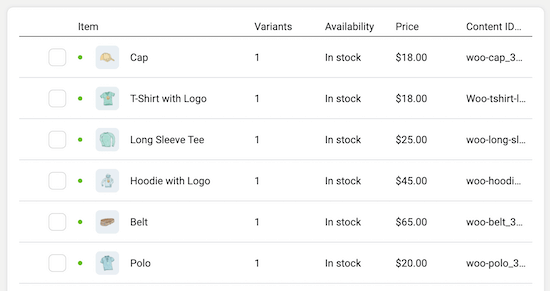
Keep in mind, Facebook will manually review your store integration, so it can take a few weeks for your store to be live on your Facebook page.
Must-Have Plugins to Grow Your WooCommerce Store
After you’ve added your WooCommerce store to Facebook, you’re probably looking for ways to further improve your traffic and revenue.
The plugins below will help you optimize your WooCommerce store and make more sales.
1. OptinMonster
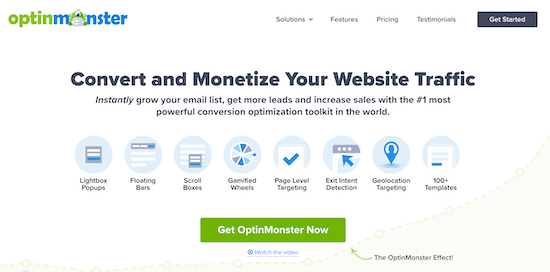
OptinMonster is the best lead generation software in the market. With this tool, you can easily convert abandoning website visitors into email subscribers and then into paying customers.
The drag and drop builder lets you create campaigns to improve your sales, reduce cart abandonment, show targeted website messages, grow your email list, and more.
You can even create floating bars to highlight your sales, announce free shipping, showcase your special offers, and a lot more.
2. All in One SEO
All in One SEO is the best SEO plugin in the market used by over 2 million websites. It lets you simply optimize your WooCommerce store and products to improve your search engine rankings without having to learn SEO.
You can simply generate an SEO title and description for all of your products. You can also create an XML sitemap for your products to help the search engines find and index your products in the search results.
Rich snippets schema markup is also included, which will help your product listings stand out in the search results and bring you more traffic.
3. MonsterInsights
MonsterInsights is the best Google Analytics solution for WooCommerce. It has enhanced eCommerce tracking that lets you easily track your eCommerce data.
Google Analytics can be difficult for beginners. MonsterInsights makes it easy by displaying all of your WooCommerce data directly in your WordPress dashboard.
You can quickly see your top performing products and other important product data at a glance.
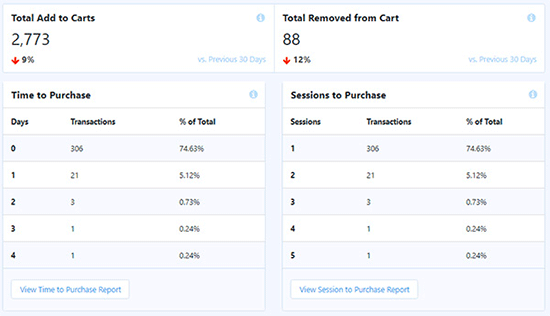
Plus, you can track your WooCommerce customers in Google Analytics to create a personalized shopping experience.
For more details, see our step by step guide on how to setup WooCommerce conversion tracking.
4. SeedProd
SeedProd is the best WordPress page builder plugin in the market. It lets you simply customize your WooCommerce product pages with the drag and drop builder.
It’s fully compatible with WooCommerce and has many WooCommerce blocks you can use to customize your product pages to improve your conversions, display popular products, customize checkout pages, and more.
SeedProd works with any WooCommerce theme so that you can customize your store without any limitations.
If you’re looking for even more must-have plugins for WooCommerce, then see our expert picks on the best WooCommerce plugins for your store.
We hope this article helped you add your WooCommerce store to Facebook. You may also want to see our expert picks on the best WooCommerce hosting or our list of the best WooCommerce WordPress themes.
If you liked this article, then please subscribe to our YouTube Channel for WordPress video tutorials. You can also find us on Facebook and Facebook.
The post How to Add Your WooCommerce Store to Facebook (Step by Step) appeared first on WPExperiencecoder.